Yard Hydrant Leaking At Packing Nut All Available Content & Media #847
Open Now yard hydrant leaking at packing nut boutique streaming. Completely free on our binge-watching paradise. Experience the magic of in a enormous collection of clips made available in HD quality, designed for deluxe viewing viewers. With the newest additions, you’ll always be ahead of the curve. Check out yard hydrant leaking at packing nut selected streaming in high-fidelity visuals for a absolutely mesmerizing adventure. Register for our content collection today to enjoy VIP high-quality content with at no cost, no strings attached. Stay tuned for new releases and delve into an ocean of indie creator works crafted for choice media supporters. Seize the opportunity for special videos—instant download available! Experience the best of yard hydrant leaking at packing nut one-of-a-kind creator videos with breathtaking visuals and members-only picks.
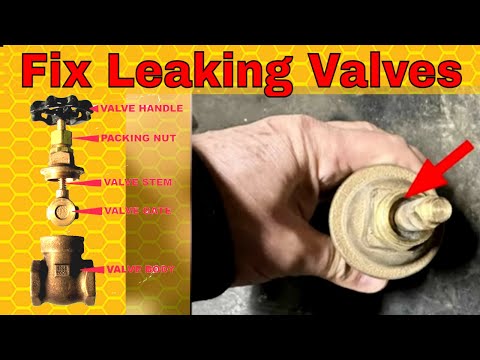
If this does not fix the problem, watch the video n. Tightening the packing nut will usually make the leaking stop 2a) this condition is more prevalent when a hose is attached, and the yard hydrant is left open with the packing subjected to full system pressure
Replacing Parts on Your Yard Hydrant 101
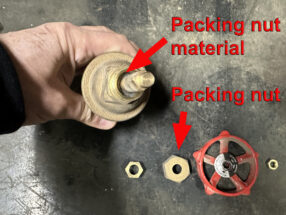
Repairing a water hydrant is presented as a simple diy task, requiring basic tools. If leaking occurs underneath the handle by the brass stem The packing washer #10102 may be reused
Reinstall the handle and linkage assembly
Tall the head assembly over the brass stem and thread onto the pipe casing Turn head assembly own enough so the set screw in the bottom link tighten packing nut until water stops leaking. The packing nut will occasionally need to be tightened to stop a packing leak Tighten the packing nut until snug and the leak stops
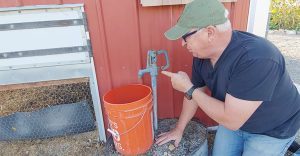
Persistent leaks will require a new packing #10101 Water leaks from below ground level when the hydrant is on A small leak may be the result of a leak at the drain hole. A yard hydrant is a convenient outdoor water source commonly used for irrigation, watering gardens, or supplying water to livestock
Over time, however, these hydrants can develop issues such as leaks, reduced water flow, or failure to shut off properly
Repairing a yard hydrant might seem daunting, but with the right tools and guidance, it is a manageable task that can restore functionality. Repairing a leaking simmons yard hydrant usually requires replacing the stem washer and packing nut First, you'll need to shut off the water supply. Got a leak from the packing nut of your merrill yard hydrant
Follow this step by step process to repair your issue with a few easy adjustments (this tutorial is only for models Here's a very easy fix for frost free hydrants that have water leaking right where the lifting rod extension (shaft or stem) exits the base assembly.i also h. In this blog, we are going to go over some of the common adjustment and repair procedures.

The most common method for troubleshooting yard hydrants is to remove the pump rod and replace the plunger, which restores the hydrant's ability to shut off the water supply
Yard hydrant troubleshooting typically involves extracting the pump rod and replacing the plunger, which restores the hydrant's ability to seal off the water flow Step by step video on how to adjust leaking water source hydrant packing nut Ead assembly over the brass stem and thread onto the pipe casing Turn head assembly down enou h s the set screw in the bottom link will engage he 14
Tighten packing nut until water stops leaking Adjust linkage so handle wil Water leaks around the brass stem below the handle linkage when the hydrant is on See w34 packing replacement instructions.
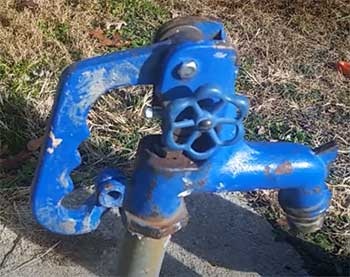
Tightening the brass packing nut, located at the stem packing, in small increments using a ¾ open end wrench can also help resolve leakage issues
By following these steps, you can identify and address any underground leaks in your yard hydrant Turn the main water valve back on, and check for leaks Tighten the packing nut only enough to stop leaking In this case, the hydrant casing will have to be flushed out, and the operating pipe will need to be taken off